Saturday, March 6, 2010

Love At First Sight

Remember our little Ikea dining table? Well, it just wasn't cutting it for us. We really wanted something a little bigger so we could seat more than just four people around it for dinner. The other day my mom calls me and tells me about a really pretty dining set she saw at Sam's Club. I soon as I see it I fall in LOVE. It's exactly what I wanted and for a great price. I call my wonderful husband, and sight unseen he tells me we can get it. Isn't he great? It fits our dining room so perfect, but before I show you I had to post some before pictures. The evolution of our dining room. :) This is what it looked like when we first moved into our house.


This is it with our old dining table.


And now with our new table.


Besides being incredibly beautiful, it came with two more chairs and a leaf (not pictured)! Now we can actually have friends and family over for games or dinner, so come on by! We'd love to have you!

Sunday, January 10, 2010

Believe it or not, the floors are done!

I am finally posting pictures of the finished product! We finished the floors and we're able to start moving our stuff back upstairs 3 days before Christmas. We are really happy with how they turned out.
The entry way, which used to be linoleum that Cal spent several hours scraping off...
Looks so much better!

Dining room.

Couple shots of the living room.

Calvin got me this new rug for Christmas.


Second bedroom. Please look past the ugly bright red futon. :)


Hallway.
Master bedroom.


Didn't Calvin do such a great job? I love that boy! :)

Wednesday, December 9, 2009

Beautiful Hardwood Floors, Here We Come!

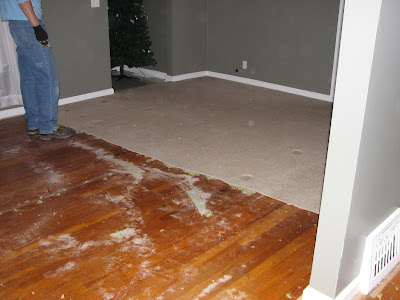
We are in the process of refinishing our hardwood floors. We started the day after Thanksgiving and this is where we are now. The sanding is finally done, and tonight we are cleaning and preparing to stain. Calvin is currently vacuuming the walls.

Me in the dusty mirror.
The dust is awful. I'm pretty sure I will be finding dust for months.

We are refinishing the living room, dining room, hallway and two bedrooms. We are getting it all done at once.

I can't make this post without mentioning our current living situation. Now, don't get me wrong I am so excited that we are doing this, and I SOOO appreciate my wonderful husband for working so hard every night this last week and my awesome dad for helping every night too, but we are living in our basement with all of our stuff! I am a little embarrased to even show this, but I think most of you know that our basement never looks like this on a regular basis. Calvin said we could be on an episode of "Hoarders" if someone just saw our basement the way it is now. Mattress in the middle of the floor, clothes scattered everywhere. Now we just need to throw some dirty trash around and we are there! :)

Tuesday, December 1, 2009

What have we got ourselves into...?

A little preview of our current house project. More pictures to come.

Thursday, July 9, 2009

DIY Roman Shades

Many of you wanted to know how I made the shade, and I am thrilled! I am glad you all love it as much as I do. Here is the link to the website that I found http://littlegreennotebook.blogspot.com/2009/02/make-shades-out-of-mini-blinds.html
You can pretty much follow her basic instructions. I did a few things a little different.

First, I ironed and sewed the edges of my fabric to give it a cleaner look, and then instead of folding the fabric edges over the ends of the slats and gluing, I glued the slats on top of my sewed edges. Just make sure your fabric isn't shorter in width than your slats or the edges of your slats will stick out from behind your fabric.

The other thing I did different was I used Tacky Glue instead of fabric glue, because I didn't have fabric glue. Tacky Glue worked well. You need to make sure that when the glue dries it doesn't leave discoloration in the fabric. You will need to cut the tilt wand off, because you won't need it anymore. I also cut a hole in the fabric on the top for the cord to come through. I think she just left it behind the fabric so you have to reach behind the shade to pull it up. I don't know which is better. It might depend on exactly how your blind functions. It also helps to have someone hold the shade tight as you glue the fabric to the bottom of the blind. I didn't do this at first and the fabric wasn't flat when I held it up.

And there you have it! That is pretty much all there is to it. It is a really easy and inexpensive project. I loved the way mine turned out. Calvin even really liked it too, believe it or not. I made a few mistakes as I went, but the next one that I do will be that much better.

Wednesday, July 1, 2009

Bathroom Makeover

We finally finished our bathroom makeover. It took about a month to finish everything from start to finish. Here is a before picture.

And this is the scary nastiness when we started tearing everything out. Ick!

And....Drum roll please....


Here is a summary of what we did; we replaced the toilet, tiled the floor, replaced the baseboards, painted the walls, trim, and door, painted the vanity, replaced the light fixture, made a new shade, and Calvin sunk the mirror into the wall.

We replaced the old linoleum, and Calvin and my cousin Curtis laid some travertine tile. It looks so good! Thanks Curtis and Becca!

I made this roman shade for a total of $6 (one yard of fabric). I used the mini blinds that were previously hanging there. I think it turned out absolutely fabulous. I can't wait to make some for my bedroom.

Friday, September 12, 2008

Our House

Here it is! I know it took me a while to post pictures, but I posted TONS so hopefully that will make up for recent lack of. So for those of you who don't know about a month ago we bought a house in Idaho Falls and so far we love it!!

This is our street. It is lined with trees. I can't wait to see it in the fall when all the leaves change color!
 Our house was built in 1940, so it has some really unique old features that give it so much character!